_1.png)


| Edd | 07-23-2013 | comment profile send pm notify |
|
By Edward Salazar Doing it yourself can give you a lot of satisfaction and save money, but only if you know what you are doing. We restore many concrete pumps every week here in Florida so I want to share our tips for removing a piston cup from your trailer pump. Positioning of the Rods Turn the machine on. It doesn’t really matter whether you bring your piston side or your rod side up (piston side is the driver and rod side is the passenger). Let’s assume you bring your rod side all the way up. To begin removing the piston cup, use the quarter-turn valve to lock the shifting cylinders and pressure the machine up. Now the piston will come all the way into the water box. Next stop the pump. Turn the machine off by hitting one of the e-stops. This verifies that the accumulator is been dumped and the pistons can’t move which will damage the pump or you! For extra safety, turn key off and remove the ground on the battery. MAKE SURE THE CHROME ROD IS ALL THE WAY BACK. Otherwise the piston will NOT come out. Removing the Piston Rods Now you are ready to begin removing the rods: Locate the concrete pump’s 2 bolts on the connecting rod and the other 2 on the dog bone connecting to the piston cup. Use a 65mm open-end wrench on the dog bone so you can spin it until you get 2 bolts visible on the top side. Leave the wrench on the dog bone so as you are loosening the 2 bolts, the cup won’t spin on you. The wrench will eventually spin, but don’t worry, it will only hit the sides of the water box. Remove these bolts and spin the whole assembly around to the other 2 bolts on the bottom. Repeat the process. Place a pry bar in the water box, apply pressure between the mud cup and the dog bone to push the mud cup a little ways into the material cylinder to allow the dog bone to fall down into the water box. Place your hand in the water box and pull the dog bone out. Use your pry bar again to remove the flange from the mud cup and start working it towards the water box until it falls down. Get Back to Concrete Pumping – Cleanup and Installation Now that you have the machine disassembled, you can clean the parts for re-installation so you can get your pump back on the construction site. Clean up the dog bone, the rod, the cup, the screws and the chromed bevel on the material cylinders. Material cylinders on a concrete pump don’t come straight to an end point, the have a bevel at the end. Make sure when cleaning and grinding the grout off this bevel, you can see the chrome when done. Grease the mud cup (the more the grease the better). Walk the NEW mud cup in there and then use the pry bar again to work the mud cup into the start of the cylinder. Once it is partially in the cylinder, you need pressure to get it all the way in so turn your power up, turn the pump ON in low idle, and from the volume control, decrease the strokes so the pistons will go slow. Hit pump forward and since you are still locked, it’s only going to go one way. So if you hit forward and it pressures out, that means you have to go in reverse for the pistons to go the other way. Hit reverse until it meets the mud cup. Check to make sure that it’s going to go in straight and start the OFF and ON with the switch until it pushes the mud cup into the material cylinder. Measure about how much the dog bone is going to make up the difference as you are pushing it in so when you are re-installing it, it will fit right into the mud cup and the rod cup. Now you just doe the reverse of what you did to remove it. Start replacing the 2 bolts on the top using your wrench and spinning the dog bone. Spinning the mud cup will be hard since is new, just use a pipe for leverage on your wrench when you do the 2 bolts on the bottom. We hope these pump maintenance tips help you get back to pumping concrete quickly! If you are not comfortable with this procedure, we recommend using a professional for the safety of your equipment and yourself, Be safe 
|
||
| TooTall | 07-23-2013 | reply profile send pm notify |
|
Piston side & Rod side has nothing to do with right or left.. Every individual hydraulic cylinder has a piston side and a rod side. A concrete pump operating on Rod side means the hydraulic pressure is being applied to the rod side (bottom) of the dif. cylinder while the oil behind the piston is looped over to the Piston side of the opposite dif cylinder driving it forward. A concrete pump operating on Piston side is just the opposite. Oil pressure is applied to the piston side (top) of the dif cylinder, driving the stroke forward, while the oil in the Rod side is looped over to the rod side of the opposite cylinder driving it upward/reverse. Pumping on piston side greatly increases the face pressure applied to the concrete and delivery system. Rod side increases output volume with less face pressure. Good explaination on the piston head replacement process though, I like to refer to the right/left as curb side & street side... depending on which country Im in :) |
||
| sherpa | 07-23-2013 | reply profile send pm notify |
|
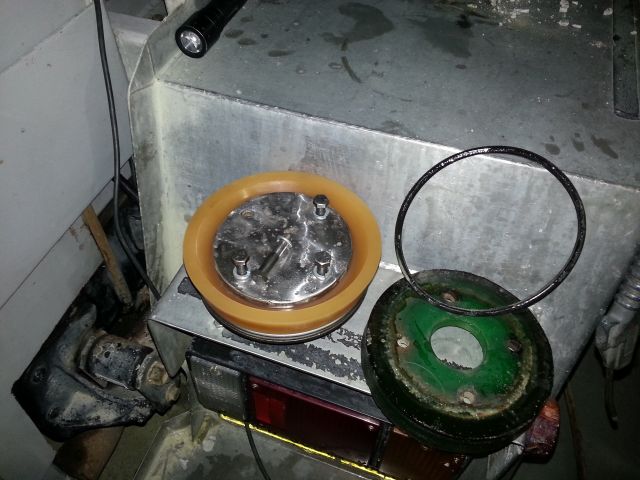
like this :D 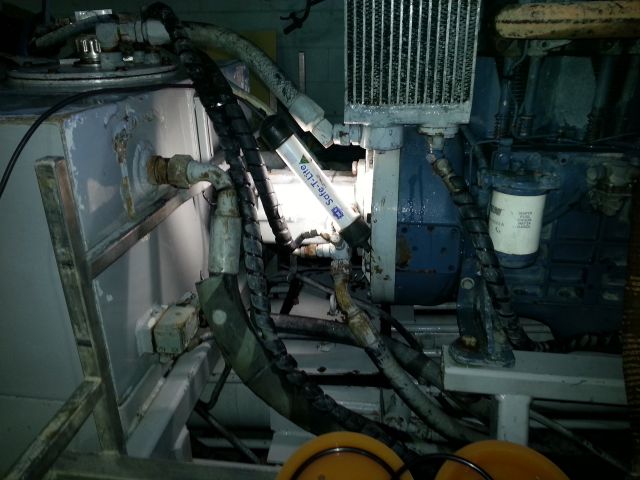
|
||
| sherpa | 07-23-2013 | reply profile send pm notify |
|
|
||
| sherpa | 07-23-2013 | reply profile send pm notify |
|
|
||
| sherpa | 07-23-2013 | reply profile send pm notify |
|

|
||
| sherpa | 07-23-2013 | reply profile send pm notify |
|

|
||
| sherpa | 07-23-2013 | reply profile send pm notify |
|
|
||
| Edd | 07-23-2013 | reply profile send pm notify |
|
Great pictures man, thanks for sharing them with us |
||
| Dipstick | 07-24-2013 | reply profile send pm notify |
|
Nice post! TooTall is right. We switched the hoses on a putz bsa 1409 to get more pressure from the pump. If you don't need all that pressure but want volume you can switch back. The effect is almost like switching gear on a car.. Reason why its goes faster (more volume) when you pump the oil in to the rod side is that you need less oil to get the rod all the way up.. The rod itsself takes some space... That space doesn't need to be filled with oil so faster.. But the surface of the piston is smaler.. Again because you lose the suface where the rod is welded on the piston... So less suface is less pressure.. |
||


.jpg "Schwing Concrete Pump")
.gif "Sany Concrete Pumps")

.jpg "Hyundai Everdigm")


.jpg "SchwingParts.com")


